Pre-Requisites
As with all HealthCast software, please check to make certain that all pre-reqs are installed. All that are stated MUST be installed. There are some pieces of software that require both the x86 and the x64 versions of the pre-requisite to work properly.
- The server certificate must be installed.
- Note: The certificate must have the Fully Qualified Domain Name (FQDN) as the Subject Field.
- User and Admin Groups should be created in AD and users added.
Supported Versions of eXactAccess
- 4.14
- 4.13
- 4.12
Installation
Reach out to Support to request the Audit Monitor installation files.
Use the Audit_Monitor_Setup_v1.0.exe file for installation. Refer to the following sections for next steps after the installation has completed.
Post Installation
After running the installer for the Audit Monitor, you will need to run both a PowerShell and SQL script from the tool's new install path.
PowerShell Script
- The script must be run on the server that will be hosting the SSO Audit Monitor application.
- The script must be run as an administrator.
- The script sets up the administration tools using the FQDN from the Certificate subject field.
- The script opens port 5000 on the server's firewall to allow access.
File Location
C:\Program Files (x86)\HealthCast\SSO Audit Monitor\Config\SsoAuditMonitorSetup.ps1
SQL Script
Before executing the provided SQL script, you must update the first line of the script to use the name of your Audit database for your eXactAccess installation.
Where the .sql script says “USE AUDIT”, you will change the word “AUDIT” to the name of your actual Audit Database.
File Location
C:\Program Files (x86)\HealthCast\SSO Audit Monitor\Config\CreateDb.sql
Example
USE auditServer
Setting User Permissions
-
Using the SQL Server Manager, grant permissions to the AD user account selected (ExactAccess Active Directory user account) or the account created for the Environment Prerequisites.
- Select the Security Folder and right-click > New > Login.
- Fill in the Login Name.
- On the left-hand side, select User Mapping.
- Select (or check ☑) the Audit Database and enable the roles db_datareader and db_datawriter at the bottom of the window.
- Note: If using Windows Authentication, the db_owner permissions should be set with the ExactACCESS configuration and will not require the additional permissions.
-
Open the File Explorer and browse to
C:\Program Files (x86)\HealthCast\SSO Audit Monitor.
a. Locate the file namedappsettings.json.
b. Openappsettings.jsonwith a text editor.
c. Update the lineServer=(your server name).
d. Update the lineDatabase=(your database name).
e. Save the changes and close the file. -
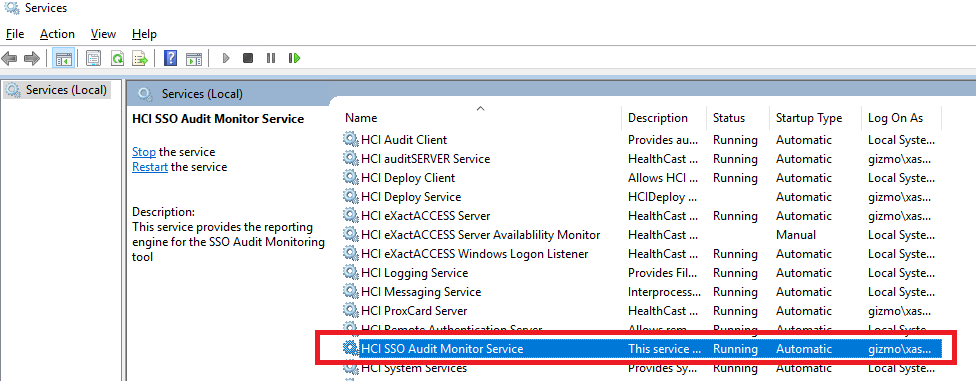
Open the server's Services.
- Locate the service HCI SSO Audit Monitor Service.
- Double-click it to open the service properties.
- Set the Log On As to the AD user who has permission to access the SQL database.
- Set the Startup Type as Automatic.
- Click OK.
-
Start or restart the service.
Configuration
Admin and User Groups
- The Admin and User Groups refer to domain security groups, each having specific permissions within Audit Monitor. Only one domain security group may be defined for either the Users Group or the Admins Group.
- Any member of the Users Group may log in and run reports.
- Any member of the Admins Group may log in and run reports, as well as access the Settings page.
The Settings Page
The Settings page allows you to configure Audit Monitor settings. Currently, the only two settings that can be configured are the Users Group and the Admins Group.
When Audit Monitor is installed, it sets the default Users Group to Domain Users, and the default Admins Group to Domain Admins.
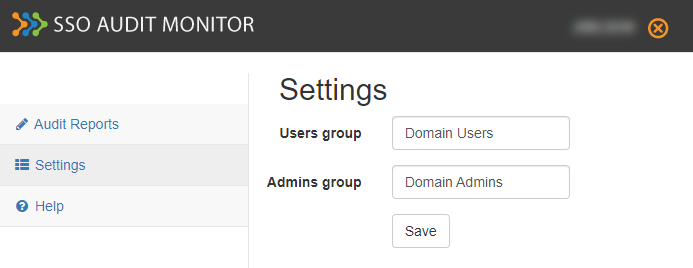
Changing the Users or Admins Group
- Log in to Audit Monitor as a user who is a member of the Admins Group Active Directory security group (e.g., Domain Admins).
- Click the Settings link.
- Change the Users group to a different AD security group.
- Change the Admins group to the desired AD security group.
- Click Save.
Changing the Users or Admins Group - Alternative Method
After installation, if you need to change the Users or Admins group and you are not a member of Domain Admins (and therefore don't have access to the Audit Monitor Settings page), but you have access to the Audit SQL database, you can change the setting through SQL.
-
Log in to the SQL Server that hosts the Audit database using a tool such as SQL Management Studio.
-
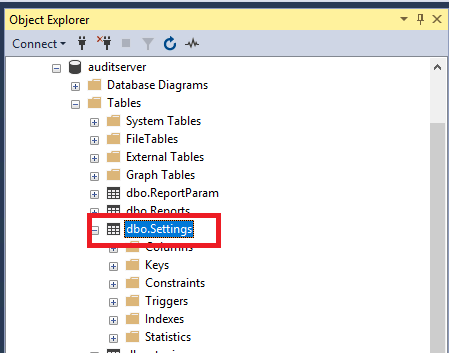
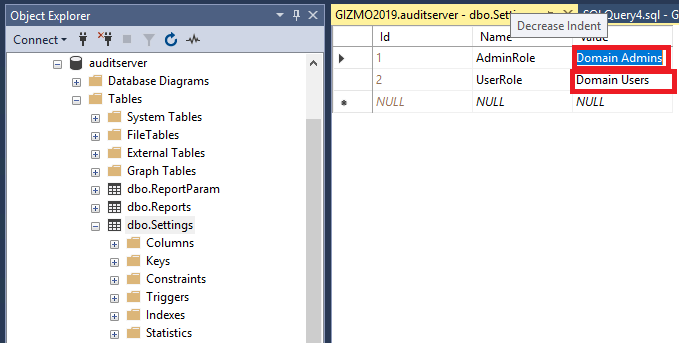
Expand the Tables folder and select the Settings table.
-
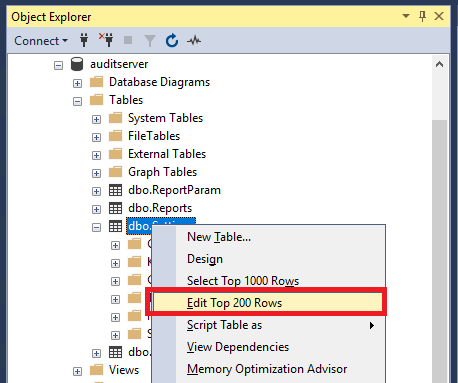
Right-click the Settings table and select Edit Top 200 Rows.
-
This will open up a window that shows the two Audit Monitor Roles settings. You may change the Value setting to the desired AD security group for either AdminRole or UserRole.
-
After making this change, the HCI SSO Audit Monitor Service must be restarted in order for the changes to take effect.