Server Configuration for EPCS
Prior to enrolling users, there are prerequisite steps required for setup on both the RapidIdentity Server and the ExactAccess Server, as part of the EPCS configuration.
- Creating New Fingerprint Profile
- Creating New OTP Profile
- Creating HealthCast EPCS Authentication Sets for Users
- Creating an Authentication Set for Enrollment Supervisors
- Creating a New Role for the Enrollment Supervisor
Creating New Fingerprint Profile
In order to assign a new Profile to a Set, administrators must first create the new Profile.
Follow these steps to create a new Fingerprint Profile.
- In the Administration Portal in the RapidIdentity MFA Server, open Methods > Biometric > Click New Profile.
- Enter a Name and Description and modify the criteria as needed.
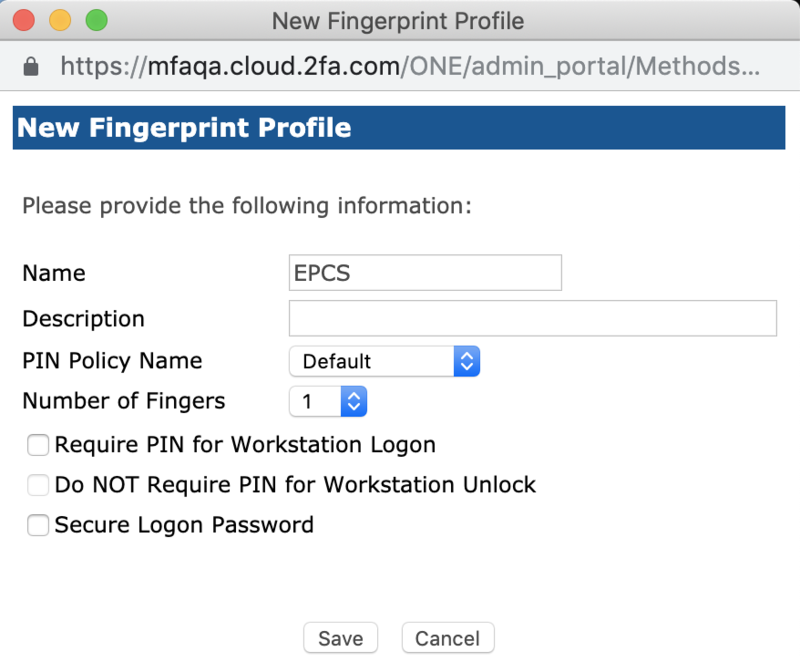
- Select the number of fingers that will be required for the set to be used for user enrollment.
- Ensure that all of the boxes that follow are unchecked:
- Require a PIN for Workstation Logon
- Do NOT Require PIN for Workstation Unlock
- Secure Logon Password
- Click Save.
The new Fingerprint Profile has been successfully created.
Changing the Number of Fingerprints
Enrollment is automatically set for three fingers. The following steps show how to change the number of fingerprints required for enrollment.
- In the Administration Portal in the RapidIdentity MFA Server, go to Methods Tab > Biometrics > Click Profile List.
- Select Edit next to the EPCS.
- Select desired amount in the dropdown menu next to Number of Fingers
- Press Save.
The fingers with a better success rate are:
- Thumb
- Index
- Middle finger
Creating New OTP Profile
Once the new Fingerprint Profile is created, administrators must now create the new OTP Profile.
Follow these steps to create a new OTP Profile.
- In the Administration Portal in the RapidIdentity MFA Server, open Methods > One Time Password > Click New Profile.
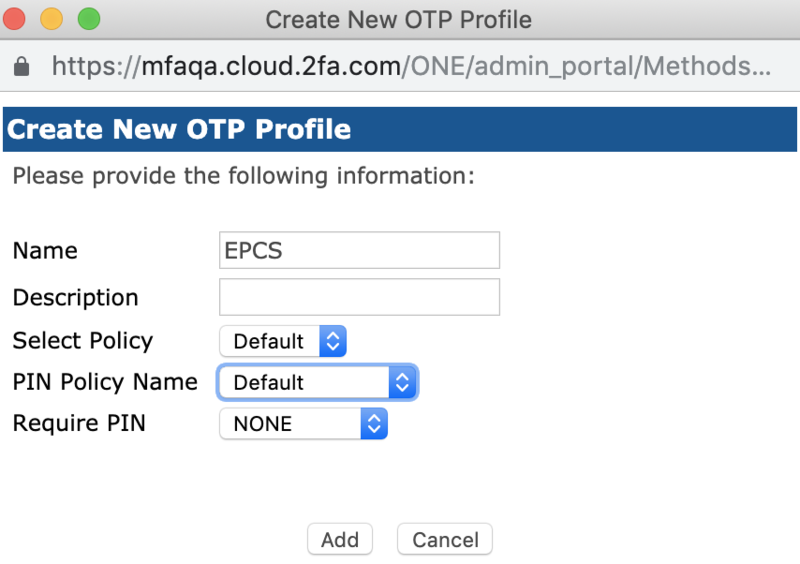
- Enter a Name and Description and modify the criteria as needed.
- Synchronization Window: This number represents how wide the range is when the administrator searches for the OTP keys upon login.
- Enrollment synchronization window: This number represents how wide the range is when the administrator searches for the OTP keys upon enrollment.
- Base retry timeout, sec: This number represents the number of seconds RapidIdentity Server waits before allowing another attempt with the OTP Token.
- Max Attempts: This number represents how many attempts until the token is locked out.
- Important:
- Ensure to set the DEA requirements.
- The default settings for new OTP Policy is designed for best practices.
- Select the desired OTP Policy and Name, and select “NONE” in Require PIN prompt.
- Click Add.
The new OTP Profile has been successfully created.
Creating HealthCast EPCS Authentication Sets for Users
The sets required for user enrollment must be initially configured in the RapidIdentity Windows Client to allow for the user enrollment process.
Authentication Combinations Supported by EPCS
There are four different authentication combinations allowed:
- Fingerprint + push token
- Password + fingerprint
- Password + push token
- Password + manual OTP
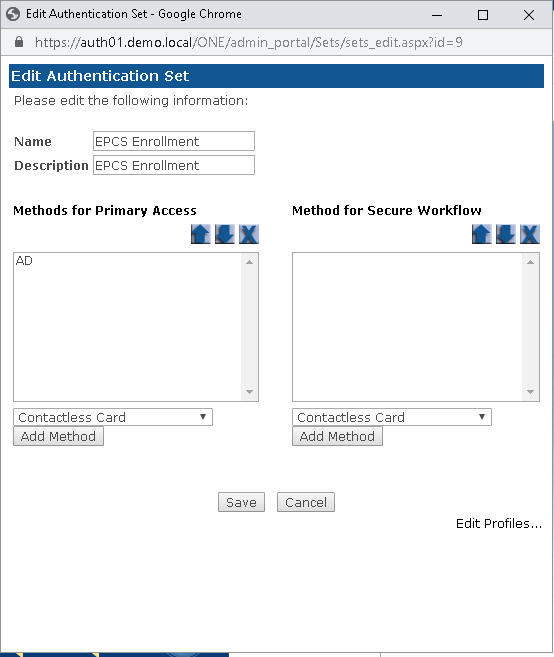
To determine these sets in the system, create new authentication sets by following these steps.
- Under the Administration Portal on the RapidIdentity MFA Server, go to Sets Tab.
- Select New Set from the left-side menu.
- The Create a New Authentication Set window will populate.
- Select a name for the set.
- Add a description (optional).
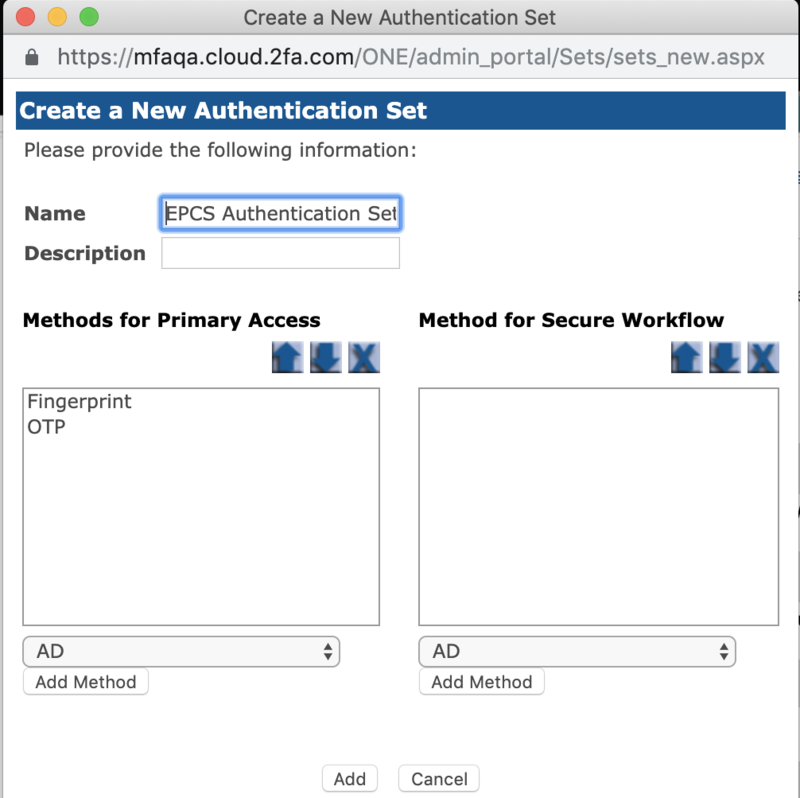
- Select OTP from the dropdown box under Methods for Primary Access.
- Click Add Method
- Select Fingerprint from the dropdown box under Methods for Primary Access.
- Click Add Method
- Add AD to methods to “Methods for Secure Workflow”
- Click Add.
The User Authentication Set is now created.
Configuring the Authentication Sets
Once the sets are created, the Fingerprint and OTP profiles must configured to not require a pin.
- In the Administration Portal in the RapidIdentity MFA Client, go to the Sets Tab
- Find and select the set created for HealthCast EPCS.
- Select Edit button.
- The "Edit Authentication Set" Window will populate.
- Click on Edit Profiles.
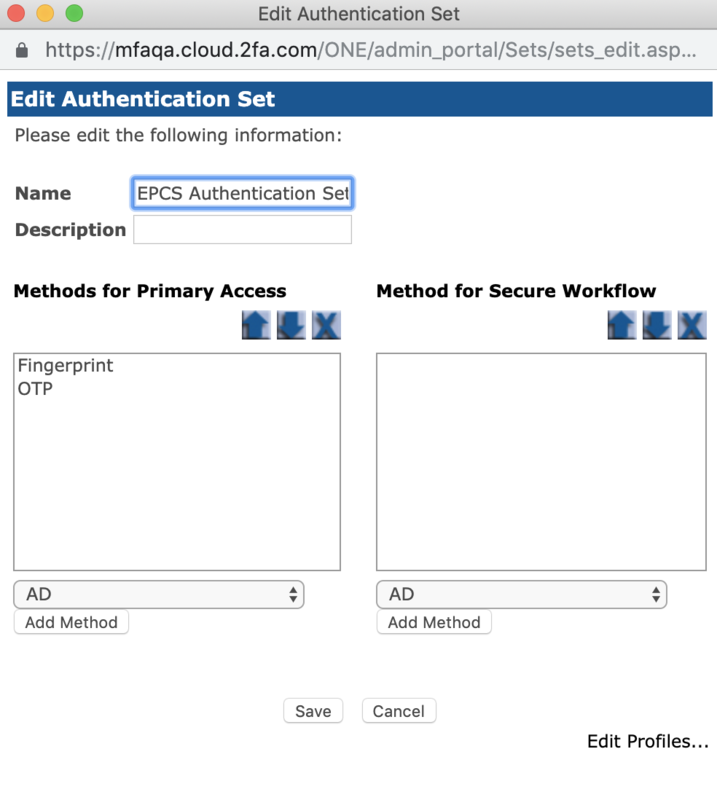
- Select the EPCS profiles created for Fingerprint method and OTP method.
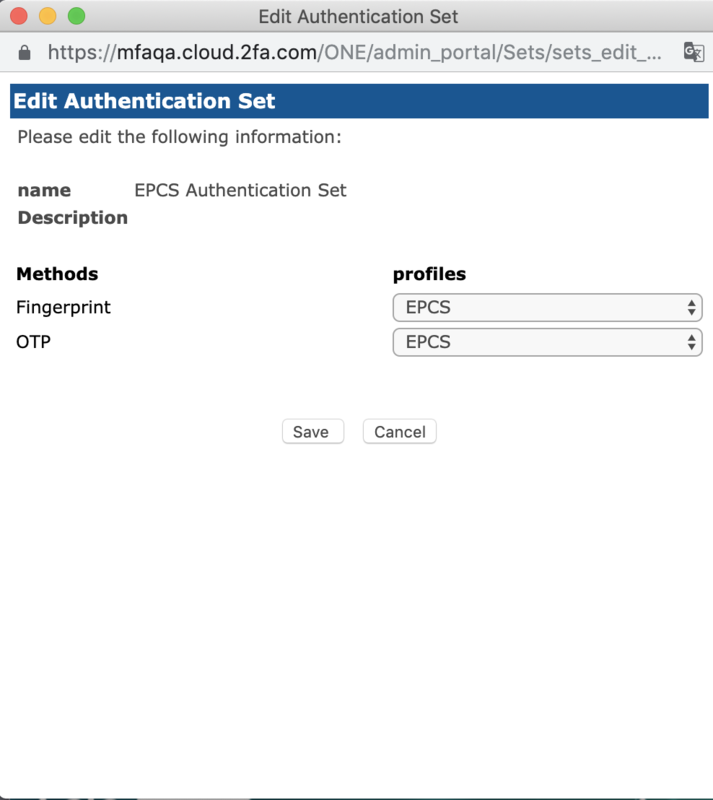
- Press the Save button.
This process needs to be performed on the OTP profile and the fingerprint profile.
Creating an Authentication Set for Enrollment Supervisors
Follow these steps to create an Authentication Set dedicated to Enrollment Supervisors.
- Under the Administration Portal on the RapidIdentity MFA Server, go to the Sets Tab.
- Select New Set from the left-side menu.
- The Create a New Authentication Set window will populate.
- Select a name for the set.
- Add a description (optional).
- Select AD from the dropdown box under Methods for Primary Access.
The Enrollment Supervisor Authentication Set is now created.
Creating a New Role for the Enrollment Supervisor
Create a New Role provides the capability to create new roles within the RapidIdentity MFA Server. This configuration displays as a pop-up window once Create a New Role is clicked.
The Enrollment Supervisor is the person involved in the EPCS authentication workflow who assists in the enrollment of physicians. The role for the Enrollment Supervisor needs to be created.
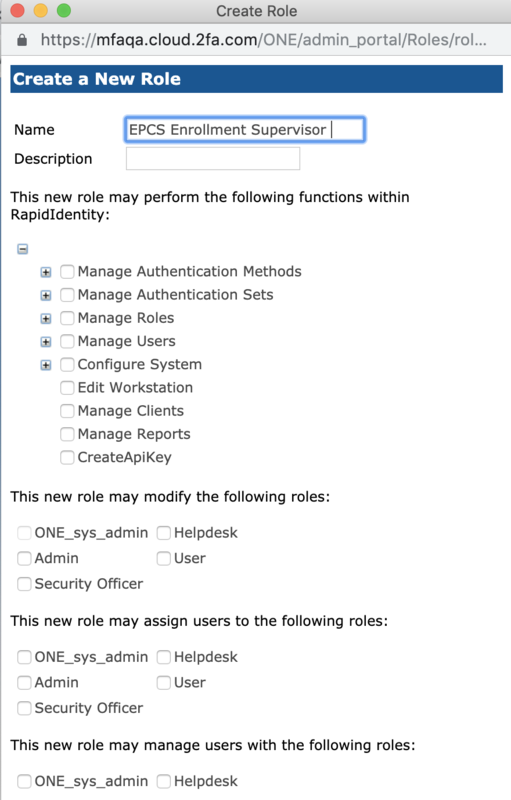
Along with naming the role and providing a description, there are four primary areas within the Create a New Role dialog that will need to be configured with the proper attributes that are dedicated to the Enrollment Supervisor role.
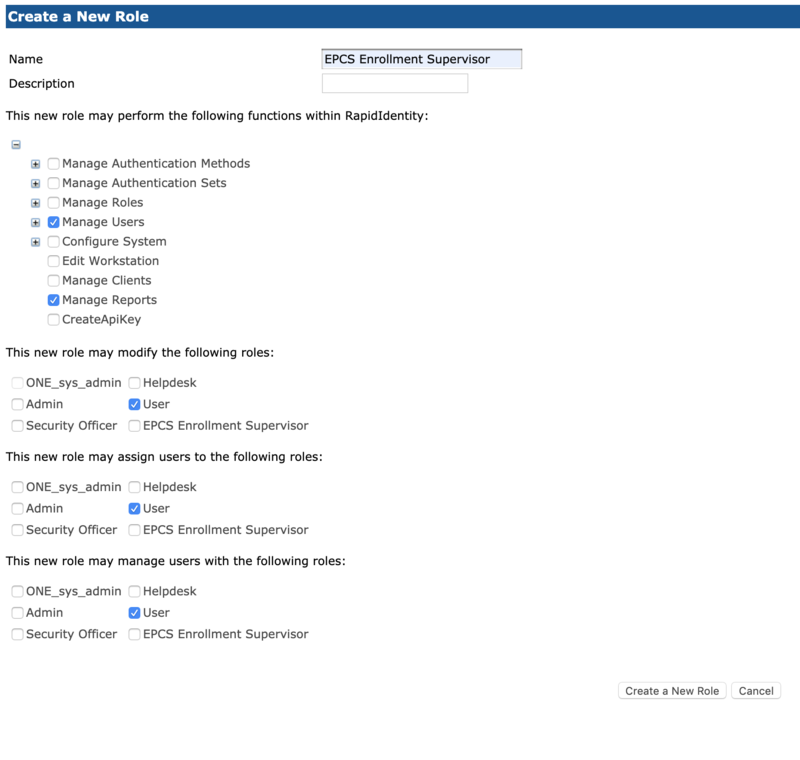
- In the administration portal, open the Roles Tab > click on Create a New Role.
- Under the Functions option, select Manage Users and Manage Reports.
- In the Modification section, select User.
- In the Assignment section, select User.
- In the Management section, select User.
Once these sections are completed, click Create a New Role.