The SAML private key certificate file generated with the IA generation tool will need to use CAPI encryption and distributed to any machine that will be hosting using EPCS 3.x. These steps will guide you through a special process that will only need to be performed one time for the certificate in order to convert the private key certificate to use CAPI encryption and Active Directory security instead of a password. This is needed for the security of the private key so that a plain-text password will not be needed when using mass deployment for distributing the certificate file.
PART 1 - Converting SAML certificate from CNG to CAPI
- Download OpenSSL using the included link. Unblock and extract it to the root of the C:\ drive on a test machine.
- Open a command prompt as admin and navigate to C:\OpenSSL\bin and run this command:
openssl.exe pkcs12 -in "c:\temp\IA Epic Hyperdrive SAML.pfx" -out "c:\temp\IA Epic Hyperdrive SAML.pem"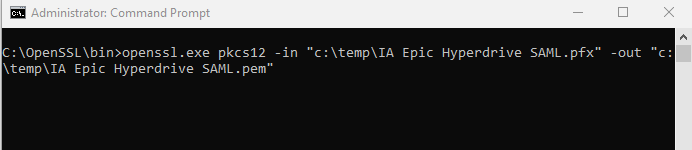 You will be prompted for your PFX password as well as a new PEM passphrase. You can enter the same value for all three prompts.
 - Enter the following command to convert the PEM file we just created to a CAPI-encrypted PFX certificate file:
openssl pkcs12 -export -in "c:\Temp\IA Epic Hyperdrive SAML.pem" -out "c:\Temp\IA Epic Hyperdrive SAML-CAPI.pfx"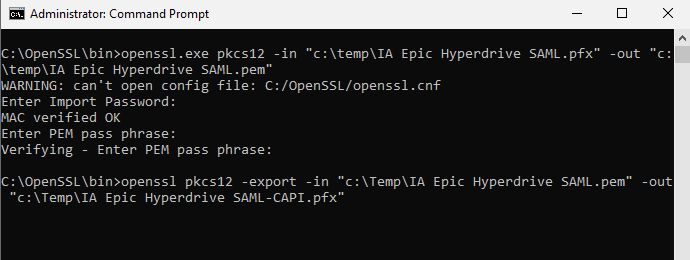
PART 2 - Converting Private Keys
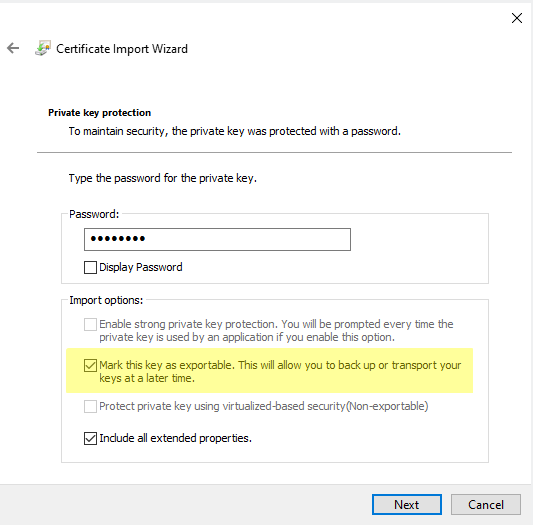
Import CAPI-encrypted IA Hyperdrive SAML private key .PFX files into local machine\personal store. During import process, mark the private key as exportable.
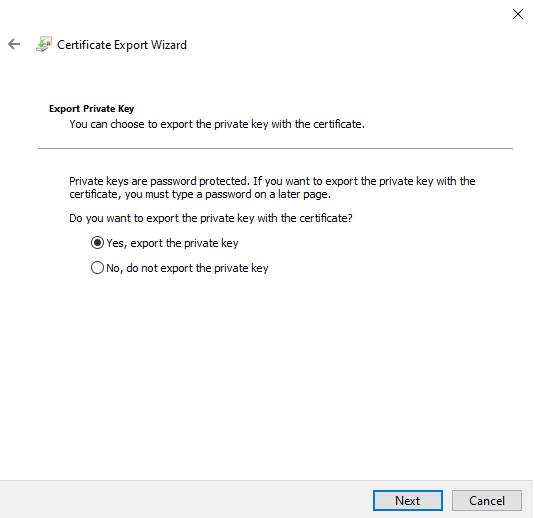
Export the IA Hyperdrive SAML private key from the personal store.
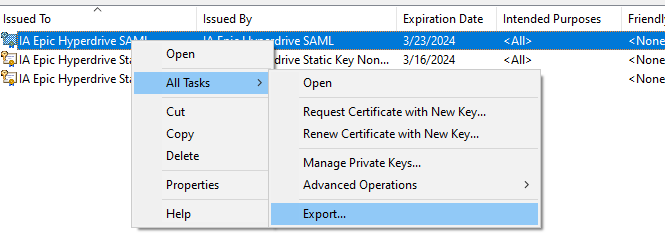
Select the option to export the private key
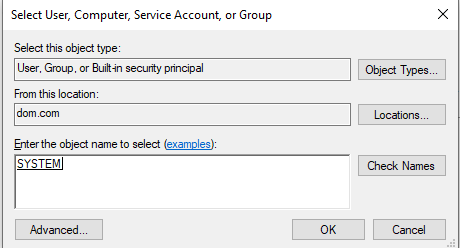
For the Security step, select the checkbox for "Group or user names" option. You will need to add an account whose context will be used to run the PowerShell script to import the private key certificates on endpoints. The "SYSTEM" account is used by default for many deployment platforms such as SCCM but can be changed based on your organizational security requirements. We recommend adding an administrative group as well so that you can maintain full control of the private key file.

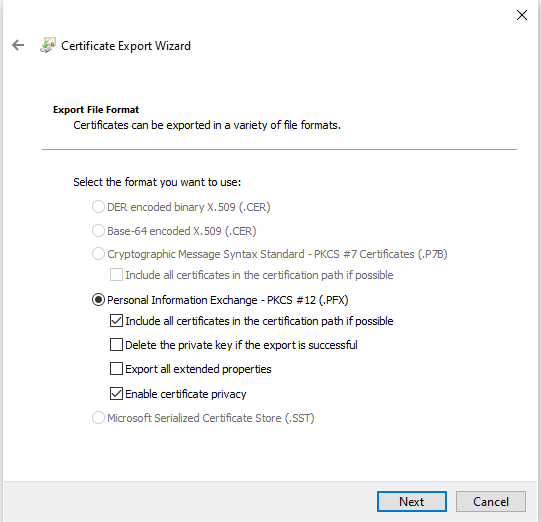
The file format can be left at default values
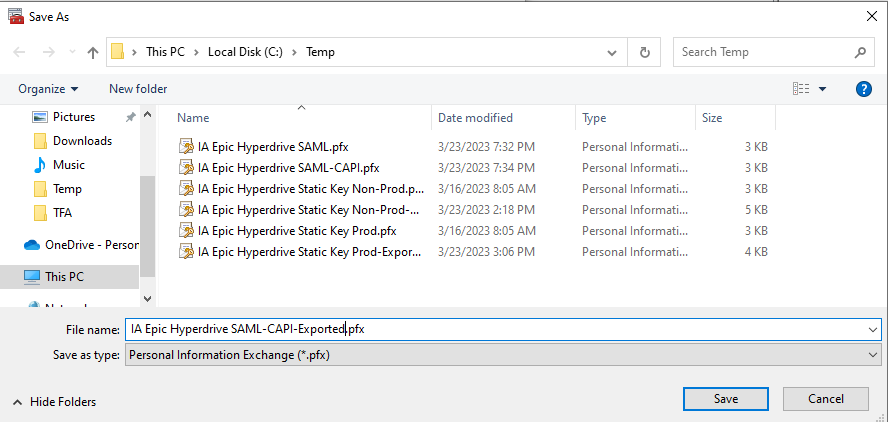
- Choose a name new name or different disk location for the new .PFX file
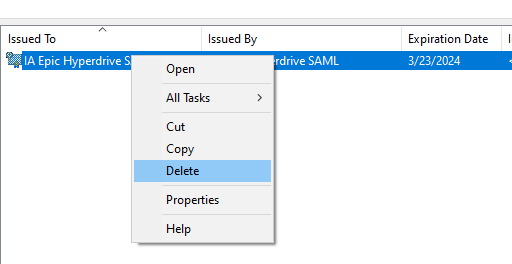
- After exporting the SAML private key, remember to go back and delete the certificate from the personal store. This is the version where we marked the private key exportable and we do not want it to remain in a state where the private key is exportable.
PART 3 - Importing Private Keys on Client Machines
This is a combined script for importing the Hyperdrive prod and non-prod private key certificates along with the EPCS SAML private key certificate.
You will want to use the 'exported' version of the private key certificate files so that a password will not be needed. The following PowerShell script will import the private key certificate. By default, the private key will not be marked as exportable using this method.
In this example script, you will need to verify or alter the the following variables to match your system and configuration
- $nonprodcertname - name of IA Hyperdrive static key for non-prod
- $prodcertname - name of IA Hyperdrive static key for prod
- $samlcert - name of IA Hyperdrive SAML certificate with CAPI encryption
- $path - location of .PFX files. This path can be local or remote path as long as the context of the account running the script has access to the files
- $domain - your Windows domain
#non-prod private key certificate name
$nonprodcertname = "IA Epic Hyperdrive Static Key Non-Prod-Exported.pfx"

#prod private key certificate name
$prodcertname = "IA Epic Hyperdrive Static Key Prod-Exported.pfx"

#SAML certificate name
$samlcert = "IA Epic Hyperdrive SAML-CAPI-Exported.pfx"

#location of private key certificates
#location can be local (c:\temp), UNC (\\fileserver\share), or $PSScriptRoot to use certificates in the same location as the script
$path = "\\xa01\c$\temp"

#change to your Windows domain.  "domain.com" would be entered as "domain"
$domain = "domain"

#import private key certificates into personal store
$certname = $nonprodcertname,$prodcertname,$samlcert
foreach ($cert in $certname)
{
Import-PfxCertificate -filepath $path\$cert -CertStoreLocation Cert:\LocalMachine\my
}

#add domain users permission to private key
$SAMLcertIssuedTo = "IA Epic Hyperdrive SAML"
$SAMLcertIssuedBy = "IA Epic Hyperdrive SAML"


$storeLocation = "LocalMachine"
$storeName = "My"


# Find the certificate
$CertObj = Get-ChildItem -Path "Cert:\$storeLocation\$storeName" | Where-Object { $_.Issuer -like "*$SAMLcertIssuedBy*" -and $_.Subject -like "*$SAMLcertIssuedTo*" }

#pull the key out of the cert
$rsaCert = [System.Security.Cryptography.X509Certificates.RSACertificateExtensions]::GetRSAPrivateKey($CertObj)

#grab the permission of the key
$fileName = $rsaCert.key.UniqueName
$File = get-childitem "C:\ProgramData\Microsoft\Crypto\" -Recurse $rsaCert.key.UniqueName

Write-Host "File location: " $File.FullName

$ACL = $file | get-acl


#give "domain users" read permissions
$rule = new-object security.accesscontrol.filesystemaccessrule "$domain\domain users", "read", allow
$ACL.AddAccessRule($rule)

#apply the permission
Set-Acl -Path $File.FullName -AclObject $ACL

#display permissions
Write-Host
Write-Host "==================================="
Write-Host " ACL Access"
Write-Host "==================================="
$ACL.Acces