While it may be temping to skip this step, performing this step will greatly increase the likelihood that your QwickAccess for IGEL deployment is successful. However, you may be able to skip this step if you already have a Citrix connection configured on your IGEL endpoints and you are sure that it is working properly.
While QwickAccess for IGEL conveniently launches and logs into Citrix with the tap of a badge, it will not create a Citrix connection or fix Citrix related issues.
Therefore, before deploying QwickAccess for IGEL to any of your IGEL endpoints, you must first configure and test the Citrix connection that you plan to use. Deployment of QwickAccess for IGEL can only proceed after the test is successful.
Following are the steps to configure, deploy, and test the Citrix connection on an IGEL endpoint.
Configure and Deploy
Using the IGEL UMS Console app, import the Citrix Sample Profile to your IGEL UMS.
In the IGEL UMS Console app, double-click the Citrix Sample Profile and edit the following settings to match to your environment.
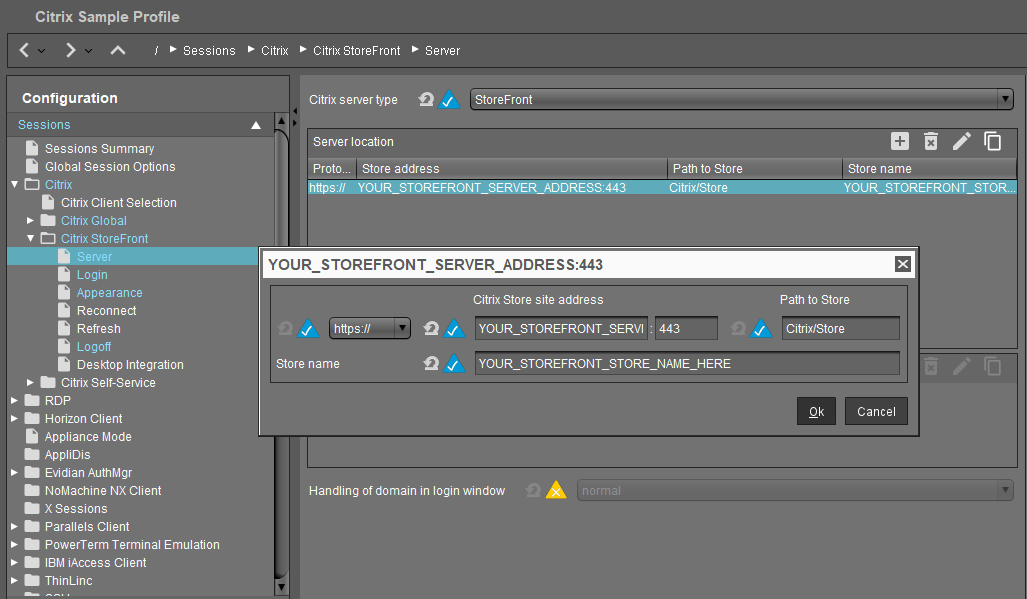
Within the profile, navigate to Sessions > Citrix > Citrix StoreFront > Server
Under Server location on the right, double click the entry to edit its values (see screenshot below).
Enter values for Citrix Store site address, Path to Store, and Store name so that they match your environment.
Click OK and then click Save.
Deploy the Citrix Sample Profile to an IGEL endpoint by dragging and dropping it on the endpoint.
If you plan to use this profile for production deployment of the connection settings to your IGEL endpoints, then you may also wish to consider what other settings should be changed in this profile beyond the basic recommended settings to achieve your desired result.
Test
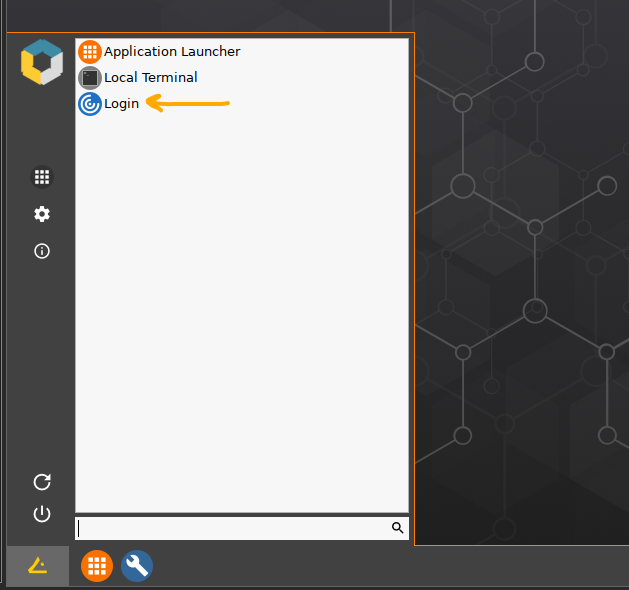
Launch the connection on the IGEL endpoint by opening the Start Menu on the IGEL endpoint, then click the Login menu item (see screenshot below).
When prompted, manually log in and allow Citrix to display or launch your app(s) or desktop.
If the active connection only places app or desktop icons on your local desktop, double click them to launch the app(s) or desktop.
Next, open the Start Menu on the IGEL endpoint and click the Logoff menu item to log off and close any open app(s) or desktop.
The test will be successful if both login and logoff work exactly as you expect and works in the same way that users would use Citrix on IGEL endpoints without QwickAccess for IGEL deployed.
After successfully testing the Citrix connection you are ready to move on to the next deployment step, Step 4: Add files to IGEL UMS.