This article covers different methods for automatic installation and configuration of the EpicAuth Plugin.
Automating the EpicAuth Plugin Install
Automating Certificate Deployment
Automating the EpicAuth Plugin Install
The EpicAuth plugin is packaged as an msi installation file, and can be deployed using commonly-used deployment methodologies (e.g. Microsoft deployment tools).
Automated Certificate Deployment
The prod and non-prod private key certificate files generated with the IA generation tool will need to be distributed to any machine that will be hosting Hyperdrive. If you are running Hyperdrive locally, you will need to have the private key certificates on all of your endpoints so that they can be registered.
These steps will guide you through a process is to convert the private key certificate to use Active Directory security instead of a password. This is needed for the security of the private key so that a plaintext password will not be needed when using mass deployment for distributing the certificate files.
Converting Private Keys
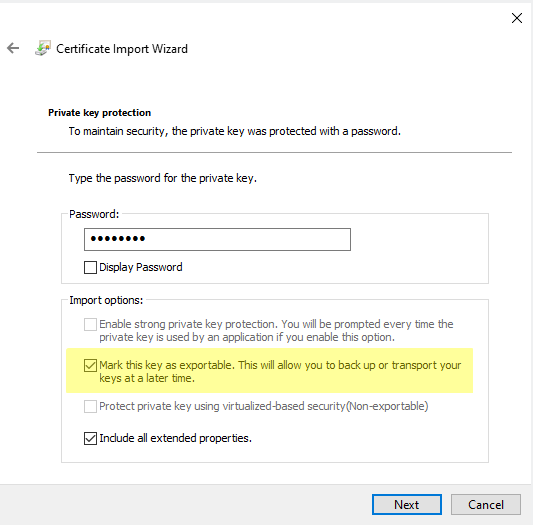
1. Import prod and non-prod private key .PFX files into local machine\personal store. During import process, mark private key as exportable.
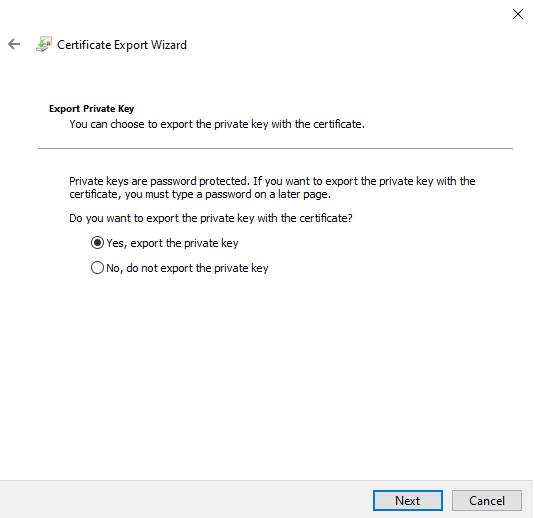
2. Export the prod and non-prod private keys from the personal store.

3. Select the option to export the private key
4. For the Security step, select the checkbox for "Group or user names" option. You will need to add an account whose context will be used to run the PowerShell script to import the private key certificates on endpoints. The "SYSTEM" account is used by default for many deployment platforms such as SCCM but can be changed based on your organizational security requirements. We recommend adding an administrative group as well so that you can maintain full control of the private key file.

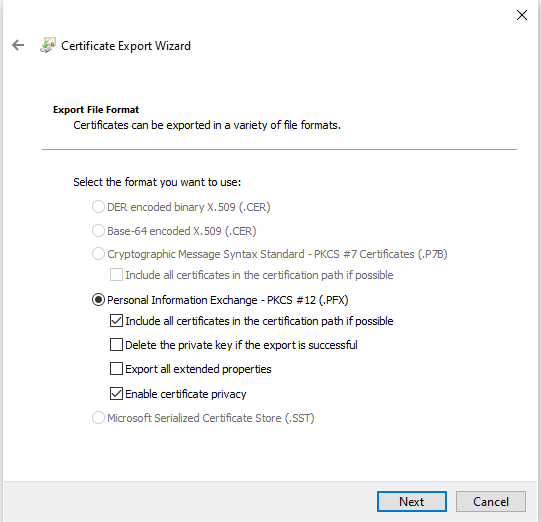
5. The file format can be left at default values
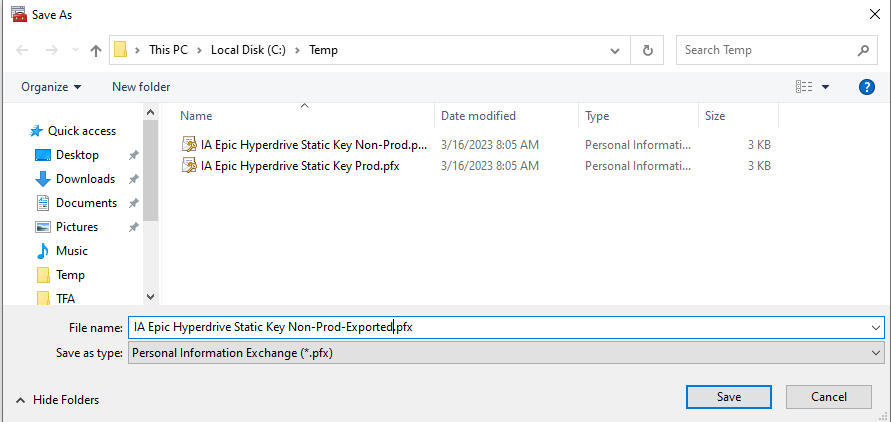
6. Choose a name new name or different disk location for the new .PFX file
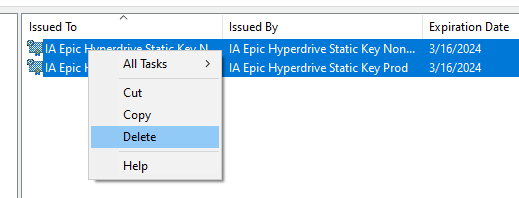
7. After exporting both prod and non-prod, remember to go back and delete the certificates from the personal store. These are the versions where we marked the private keys exportable and we do not want them to remain in a state where the private keys are exportable.
Importing Private Keys on Client Machines
The private keys will need to be imported on any machine that is running Hyperdrive so that the machine can use the ClientRegister tool.
You will want to use the 'exported' version of the private key certificate files so that a password will not be needed. The following PowerShell command will import the private key certificate. By default, the private key will not be marked as exportable using this method.
In this example script, you will need to alter the private key certificate name and path. The $path value supports local and UNC paths as long as the context of the account running the script also has access to the location.
#non-prod private key certificate name$nonprodcertname = "IA Epic Hyperdrive Static Key Non-Prod-Exported.pfx"#prod private key certificate name$prodcertname = "IA Epic Hyperdrive Static Key Prod-Exported.pfx"#location of private key certificates#location can be local (c:\temp), UNC (\\fileserver\share), or $PSScriptRoot to use certificates in the same location as the script$path = "\\xa01\c$\temp"#import private key certificates into personal store$certname = $nonprodcertname,$prodcertnameforeach ($cert in $certname){Import-PfxCertificate -filepath $path\$cert -CertStoreLocation Cert:\LocalMachine\my}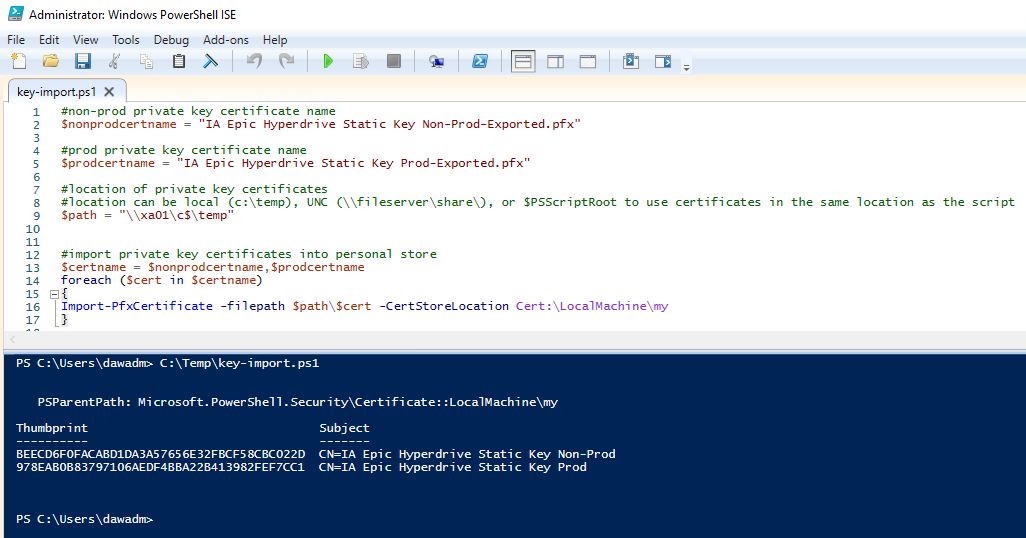
Client Registration
EpicAuth versions 4.3.2.2 and higher include functionality for bypassing the user interface and performing command-line registration.
IMPORTANT
The command-line registration must be run with Administrative permissions.
Register against Non-Production
To register against non-production, use the following format, and replace environmentName and interconnectUrl with the appropriate values.
"C:\Program Files (x86)\Identity Automation\EpicAuth\IA.EpicAuth.RegisterClient.exe" --env {environmentName} --url {interconnectUrl}
EXAMPLE: the following command line registers the EpicAuth client against the testing environment using the associated Interconnect URL.
Non-Prod:
"C:\Program Files (x86)\Identity Automation\EpicAuth\IA.EpicAuth.RegisterClient.exe" --env testing --url https://fhir.epic.com/interconnect-fhir-oauth/oauth2
Register against Production
To register against non-production, use the following format, and replace audience and interconnectUrl with the appropriate values.
"C:\Program Files (x86)\Identity Automation\EpicAuth\IA.EpicAuth.RegisterClient.exe" --aud {audience} --url {interconnectUrl}
EXAMPLE: the following command line registers the EpicAuth client against a production environment using its associated audience and Interconnect URL.
Prod:
"C:\Program Files (x86)\Identity Automation\EpicAuth\IA.EpicAuth.RegisterClient.exe" --aud urn:ia:interconnect-prd-ce --url https://fhir.epic.com/interconnect-fhir-oauth/oauth2