Proximity Card Configuration
Features
Proximity card login is used in conjunction with the Username and Password login dialog. In addition to Proximity Card authentication, the user can be required to type a PIN in response to a badge tap to complete the login to the ExactAccess SSO solution. The user interface may be customized by changing the background images, the font face, color and size for various prompts, as well as the layout of the dialog utilizing a mask image.
Supported Proximity Card Readers
| Card Type | RFIdeas Reader Models | HID Global/Omnikey |
|---|---|---|
| HID Cards | RDR-6082AKU (HID ID) RDR-80582AKU (HID CSN or ID) RDR-80082AKU (HID ID) |
OMNIKEY 5021 CL (HID ID) |
| iCLASS Cards | RDR-7082AKU (iCLASS ID) RDR-7582AKU (iCLASS CSN) RDR-80582AKU (iCLASS CSN) RDR-80082AKU (iCLASS ID) |
OMNIKEY 5022 CL(iCLASS CSN) |
| Indala cards | RDR-6382AKU | |
| MiFARE Cards | RDR-7582AKU |
- Reader models cannot be mixed in the same environment.
- Card serial number (CSN) do not support Parity Checking, Facility ID filtering, or Badge ID range checking features provided by ExactAccess.
- Reader must be pre-configured for compatibility with card type and data type, as the reader supports dual band communications. Only a single band can be utilized at a time
- Parity Checking, Facility ID filtering, or Badge ID range checking features are not available with this reader model.
Card readers that only read the card serial number (CSN) cannot be configured with advanced features such as Parity Checking, Facility ID filtering, and Badge ID range checking.
Card readers supporting card serial number (CSN) typically read 64-bit serial number values.
ConfigurationReader Type
Using RFIdeas Readers
HKLM\Software\HealthCast\ProxCardClient
ReaderType: reg_sz = USB
Using OMNIKEY Readers
HKLM\Software\HealthCast\ProxCardClient
ReaderType: reg_sz = SCARD
Server connectivity
HKLM\Software\HealthCast\ProxCardClient\Indy
The following registry settings must also be present and configured
**CompressionClass: **reg_sz = one of the following values:
NONE
VCLZIP
EncryptionClass: reg_sz = one of the following values:
RIJNDAEL
RIJNDAEL128
RIJNDAEL256
BLOWFISH
0000: reg_sz = The sferver DNS name or IP address where HealthCast ProxCard Server has been installed and configured.
EnabledServerIDs: reg_sz = "0000" - this must contain at least one active server number
**Port: **reg_dword = 30000 - the default port for communications. If you have altered the default listening port during the server installation, update this for the correct port number.
If you have client side fail over configured for Remote Authentication, you may also want to configure fail over for ProxCard. This is accomplished the same way as for Remote Authentication.
Add a new entry:
0001: reg_sz - add the secondary server DNS name or IP address
Update the EnabledServerIDs as a comma separated list of active servers:
EnabledServerIDs: reg_sz = "0000,0001"
When using client side fail-over, DNS lookup failure could cause excessive time for failure detection. If this happens, the client will not test all available servers. Use the following setting to extend the detection time (setting is specified in seconds):
HKEY_LOCAL_MACHINE\SOFTWARE\HealthCast\ProxCardClient
ConnectionTimeout: reg_dword = 8
If the setting doesn't exist, the default timeout is 1 second, so if DNS takes longer than this, secondary servers won't be attempted.
Proximity Card Self Enrollment
Open regedit and navigate to the following key:
HKEY_LOCAL_MACHINE\SOFTWARE\HealthCast\ProxCardClient
BlankBadgeScan: reg_dword = 0
The setting "SelfEnrollmentDisabledMessage" may also be modified to give users a message that self-enrollment has been disabled.
If self enrollment is disabled, then the ProxCard Administrator must be used to pre-enroll cards before they are issued to users.
Bitcount and Parity Checking
Not all badge readers or IDs will function with this feature. See System requirements for details.
These instructions are intended for XA solutions utilizing badge tap functionality. You must have badges and compatible badge readers in your environment in order to successfully monitor the bit count.
You can set the bit count in the registry to reflect the number of bits in your proximity card identification data. This is advisable if you wish to minimize the possibility that badge reads will be in error.
This is a custom security measure that will minimize the possibility that bad badge reads will cause unwanted outcomes in your environment.
Once the bit count has been set to a specific value, all cards with values that are not specified will be rejected and will not be able to create or connect to a user session. They will NOT be allowed.
Configure Bit Count Monitoring in the Registry
-
Go to Start >Run >Regedit.
-
In the Registry Editor, locate the ValidBitCount value located at:
- HKLM\Software\HealthCast\ProxCardClient
- The ValidBitcount value may not be present. You may need to add this value as a string in the ProxCardClient folder located in the directory path above.
-
Modify the value to indicate the allowed bit count(s): 26, 35, or 37.
- Multiple values may be used. Please put a comma between each value to separate them. We do support values other than 26, 35, or 37. If you have a bit count value that is not one of the standards listed above, please follow the instructions in the next section, Creating a New Bit Count Value.
If the bitcount for your card type is 26, your final registry setting will look like this:
ValidBitCount:reg_sz="26"
If you have multiple cards with varying bit counts, your final registry setting may look similar to this:
ValidBitCount:reg_sz="26,35,37"
Creating a New Bit Count Value
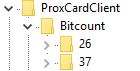
- In the Registry Editor, locate the Bitcount key located at:
- Create a new key within the Bitcount key. Use the number of your badges bits as the name of the new key.
- Because there are other configuration options based on the bit count of your badges, you will need to create some additional keys.
- In the newly created key (this key should be named with the number of bit counts contained in your badges), you must create another key. Please name this key Facility.
- The facility validation feature is explained in more detail on the Facility Validation section.
If the bitcount for your card type is 36, you would create the following registry structure:
HKLM\Software\HealthCast\ProxCardClient\Bitcount\36\facility
You would then modify the ValidBitcount value found in in HKLM\Software\HealthCast\ProxCardClient, adding your value of 36 by either replacing all other data in this value, or by appending ",36" to the end of the current list specified within the value.
The final registry setting would be similar to this:
ValidBitCount:reg_sz="36"
or
ValidBitCount:reg_sz="26,35,37,36"
Parity Settings
This is a custom setting that will minimize the possibility that bad badge reads will cause unwanted outcomes in your environment.
Parity stripping is turned OFF by default. The default setting ( 0 ) allows your system to collect data regarding the parity bits contained in your proximity badge identification data. Leave this setting as is if you are installing XA Client in your environment for the first time. It will allow for advanced troubleshooting and quicker resolution to proximity badge issues if they occur.
Changing this setting will strip the desired number of bits from your proximity badge identification data. This changes the number of bits that is stored in the ProxCard Server database to reflect the identification data minus the number designated to be stripped.
Change this setting if you are upgrading and have a ProxCard Server database that is already populated with user data from workstations that had this setting ON (1).
Users will need to re-enroll their badges when this setting is changed.
Configure Parity Stripping
- Go to Start >Run >Regedit.
- In the Registry Editor, locate the ParityStripcountLeading and ParityStripCoundTrailing values located at:
- HKLM\Software\HealthCast\ProxCardClient
- Modify them to indicate the value of 1.
- One bit stripped from the front and back of the data sequence is the most common scenario. If you feel your parity settings may be different, please contact your HealthCast Project Manager for assistance.
- If you use the parity stripping setting, please ensure that your final bit count is 24 bits or more. A bit count of less than 24 bits will make badges unusable.
Facility Code Validation
This is a custom setting that functions as a way to limit access to workstations based on the facility portion of a user's badge code. Validating facility code will minimize the possibility that bad badge reads will cause unwanted outcomes in your environment. This includes prohibiting the use of unauthorized proxcards.
Configuring the facility code validation feature requires adding new keys and values to the workstation's registry. This can be done via a transform or batch file during install or upgrade, or post-install/upgrade using the Registry Editor.
Instructions for configuring the facility validation feature will differ depending on your method of deployment, if you are installing XA for the first time, and if you are configuring your environment for parity stripping. Please contact your HealthCast representative before configuring facility validation if your scenario differs from those described below.
Set the facility mask
- Go to Start >Run >Regedit.
- Verify that the correct number of bits is specified in the ValidBitCount value located in the registry under:** HKEY_LOCAL_MACHINE\SOFTWARE\HealthCast\ProxCardClient**
- If the ValidBitCount key has not been configured, follow the Bit Count Monitoring instructions to configure it.
- Select one of the sub-keys under the BitCount key which reflect the bit count of the badge. The options are 26 and 37 bits.
- If your bit count is not one of the default counts provided, please follow the instructions in Creating a New Bit Count Value to create the appropriate bit count for your badges.
Ensure that your final bit count is 24 bits or more. A bit count of less than 24 bits will make badges unusable.
-
In the sub-key under Bitcount which reflects the number of bits in your badge (our defaults are 26, 35, and 37 you may have created another key with the appropriate number for your environment) create the following value:
- FacilityMask: reg_binary
-
Enter the appropriate hexadecimal value of your facility mask in the FacilityMask value.
- This should be set in hexadecimal.
If you have a bit count of 36, you would create the following keys in the registry:
HKLM\Software\HealthCast\ProxCardClient\Bitcount\36
Under the 36 key, you would create the following value: Facility Mask as a binary value.
FacilityMask:reg_binary=00 00 00 01 ff e0 00 00
- Continue by setting the accepted facility codes.
Set the accepted facility codes
Have the appropriate facility codes ready before continuing. The facility codes entered in this section will be the only allowable codes once this configuration is finished.
- In the Facility key, create a new reg_dword value.
- Name the value 1.
- Right-click the new value and select Modify.
- Select the appropriate Base category.
- Choose Decimal if your facility code was provided by the manufacturer of your card and it is in decimal notation.
- Choose Hexadecimal if you have calculated the facility mask in hexadecimal notation.
- In the Edit DWORD Value box enter one of the facility codes in the Value data box.
- Verify that the information in the box is correct, and select OK.
- Repeat these steps for each facility code that you would like to authorize. Name the values sequentially.
If you already have a proxcard database in place and are using parity stripping, then it is critical that your bit count settings, and other badge related registry settings, are correct.
FINAL STEPS
- First, verify the state of your parity settings.
- You can do this by reading the parity settings instructions and following the instructions there
- If your settings indicate that you are stripping bits (leading or trailing), then you must adjust your bit count to match the number of bits present AFTER parity bits have been removed.
- Example: If you are removing 1 leading parity bit and 1 trailing parity bit and you have 26 bit cards, you would calculate the final bit count as 24. If you have 35 bit cards and are stripping 2 leading bits and 1 trailing bit you would calculate the final bit count as 32.
- Follow the Enable Bit Count instructions to set the correct bit count in the registry.
- You may need to create new keys and sub-keys that reflect the bit count in your environment.
- Recalculate your facility mask using the final bit count derived from the bits remaining after parity stripping.
- Follow the directions above in the fresh installation/non-parity stripping section to configure the facility code validation.